What’s The Story, Muthur?
To the point, tabletop gaming
Popular Posts


Cheap Medieval Fantasy Terrain for Tabletop Games
Whether you play TTRPGs or miniature war games, sooner or later you might want some fantasy terrain. This piece is about where I get my terrain from and how I paint it using simple and fast methods.

By JimmiWazEre
Opinionated tabletop gaming chap
TL;DR:
Whether you play TTRPGs or miniature war games, sooner or later you might want some fantasy terrain. This piece is about where I get my terrain from and how I paint it using simple and fast methods.
Disclaimer
Heads up, there’s a few affiliate links in this piece, typically for bits and bobs that I use during the painting process. If you do click on them and then buy from them - I’ll earn a small kickback, but you won’t incur any additional charge over the normal price you’d pay.
Introduction
Months ago, I went to the UK Games Expo with my mate, and whilst we were there I picked up Guards of Traitor’s Toll (GoTT) and the Busy Streets expansion. If you’re unfamiliar, GoTT is a 1-4 player, semi-cooperative skirmish game set in the fantasy city of Traitor’s Toll. You play the role of paramilitary guards in the employment of one of the great houses. It’s your job to keep order in the city and arrest any ne’er do wells. You’re competing with the other player’s guards representing different houses trying to do the same thing in order to secure the honour of being most effective.
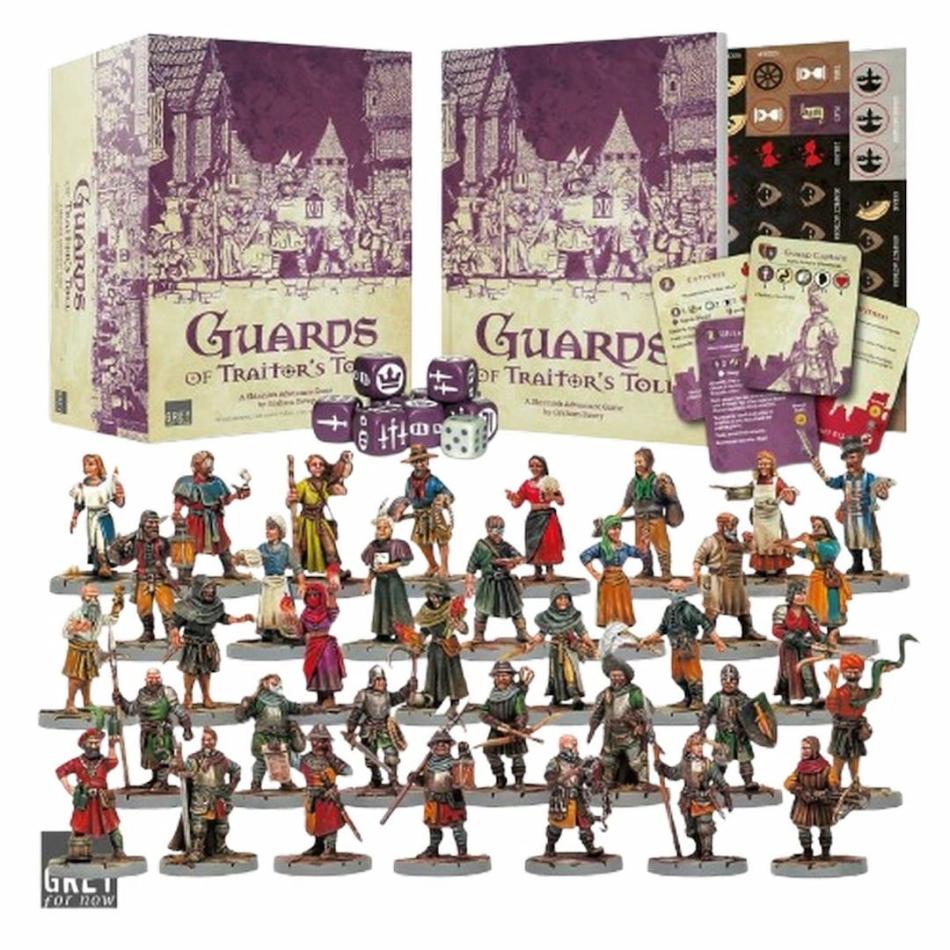
I have a bit of a personal issue though: I flat out refuse to play any ‘miniatures game’ unless everything is modelled and painted to a tabletop or better standard, and consequently, my set has been sat patiently, taking up space on my Kallax unit waiting for its moment in the sun.
In order to begin addressing this issue, naturally I found myself needing to acquire more grey plastic. If you collect and occasionally paint minis then you know what I’m talking about! In my case, I went out hunting for suitable terrain to represent the medieval city of Traitor’s Toll.
Ulvheim
I am fortunate enough to own a Bambu Labs A1 3d printer (not affiliate or sponsored, just linking), so I pretty much never have to buy terrain anymore. If you have the cash, and you have the space - I 100% recommend them. Mine has been plug and play in every sense of the word, and I’ve barely had any issues with it the entire time I’ve owned it.
Anyway, in this case I went over to Yeggi.com and started searching, and it wasn’t long before I came across this enormous Ulvheim range of terrain for free on Thingiverse. Unfortunately, the scale was ever so slightly off I thought, so I bumped it up to 120% nice and easy in my slicer and began printing several buildings, market stalls, fountains, and sections of city walls. Several reels of cheap PLA later and I have more than enough terrain to fill the required 3’ x 3’ play area. Result!


How to Paint Medieval Buildings
Logically enough, the first step is priming the models to allow the next layers of paint to stick. In my case, if you’re wanting to copy my method I recommend getting both a black and white spray can. I use Colour Forge as I consider them to be great value for money, and high quality. I’ll provide affiliate links from here on to point you at the tools and paints that I think are suitable.
Zenithal Priming
Start off by spraying the entire piece black. If you’re not familiar with spraying - good technique is to hold the can about 30 cm away and in 1 second bursts, sweep across your terrain with a spray. Rotate your piece if required and repeat. For best results, warm the can first in warm (not hot) water in the sink, and make sure to do it in a ventilated area like outside, or in the garage with the big door open.
Once it’s black, let it dry, and then taking your white primer - perform the same trick, but only attack the piece from the top, spraying downwards. You’re simulating the way light falls, making the top surface lighter than the bottom and lower surfaces.
Easily Blending Speed Paints
When your terrain piece is completely dry, for the stonework - I take two paints, these need to be speed paint, or contrast style paints if you’re following this quick and simple method. I personally use Citadel Contrast Garaghak’s Sewer & Army Painter Speed Paint 2.0 Runic Grey but you should feel free to mix it up and use more than two paints, or different colours as befits your desired aesthetic.
I then take a fairly decent sized old brush, mine’s an ancient Army Painter “Monster” brush I’ve had for about a decade now, and I ‘raw dog’ the two paints onto the model in splodges. Before it has chance to start drying, I then take my brush, dunk it in water then transfer it to my model and use it to roughly swish and swash the “raw dogged” paint around. You’ll notice it blends together really nicely, and it takes a while to dry. Once it has, you can feel free to move onto the next area.
As an aside - you should be conscious about letting the paint pool as per the bottom left of my right side image below - in these cases, wick away the excess with your brush.
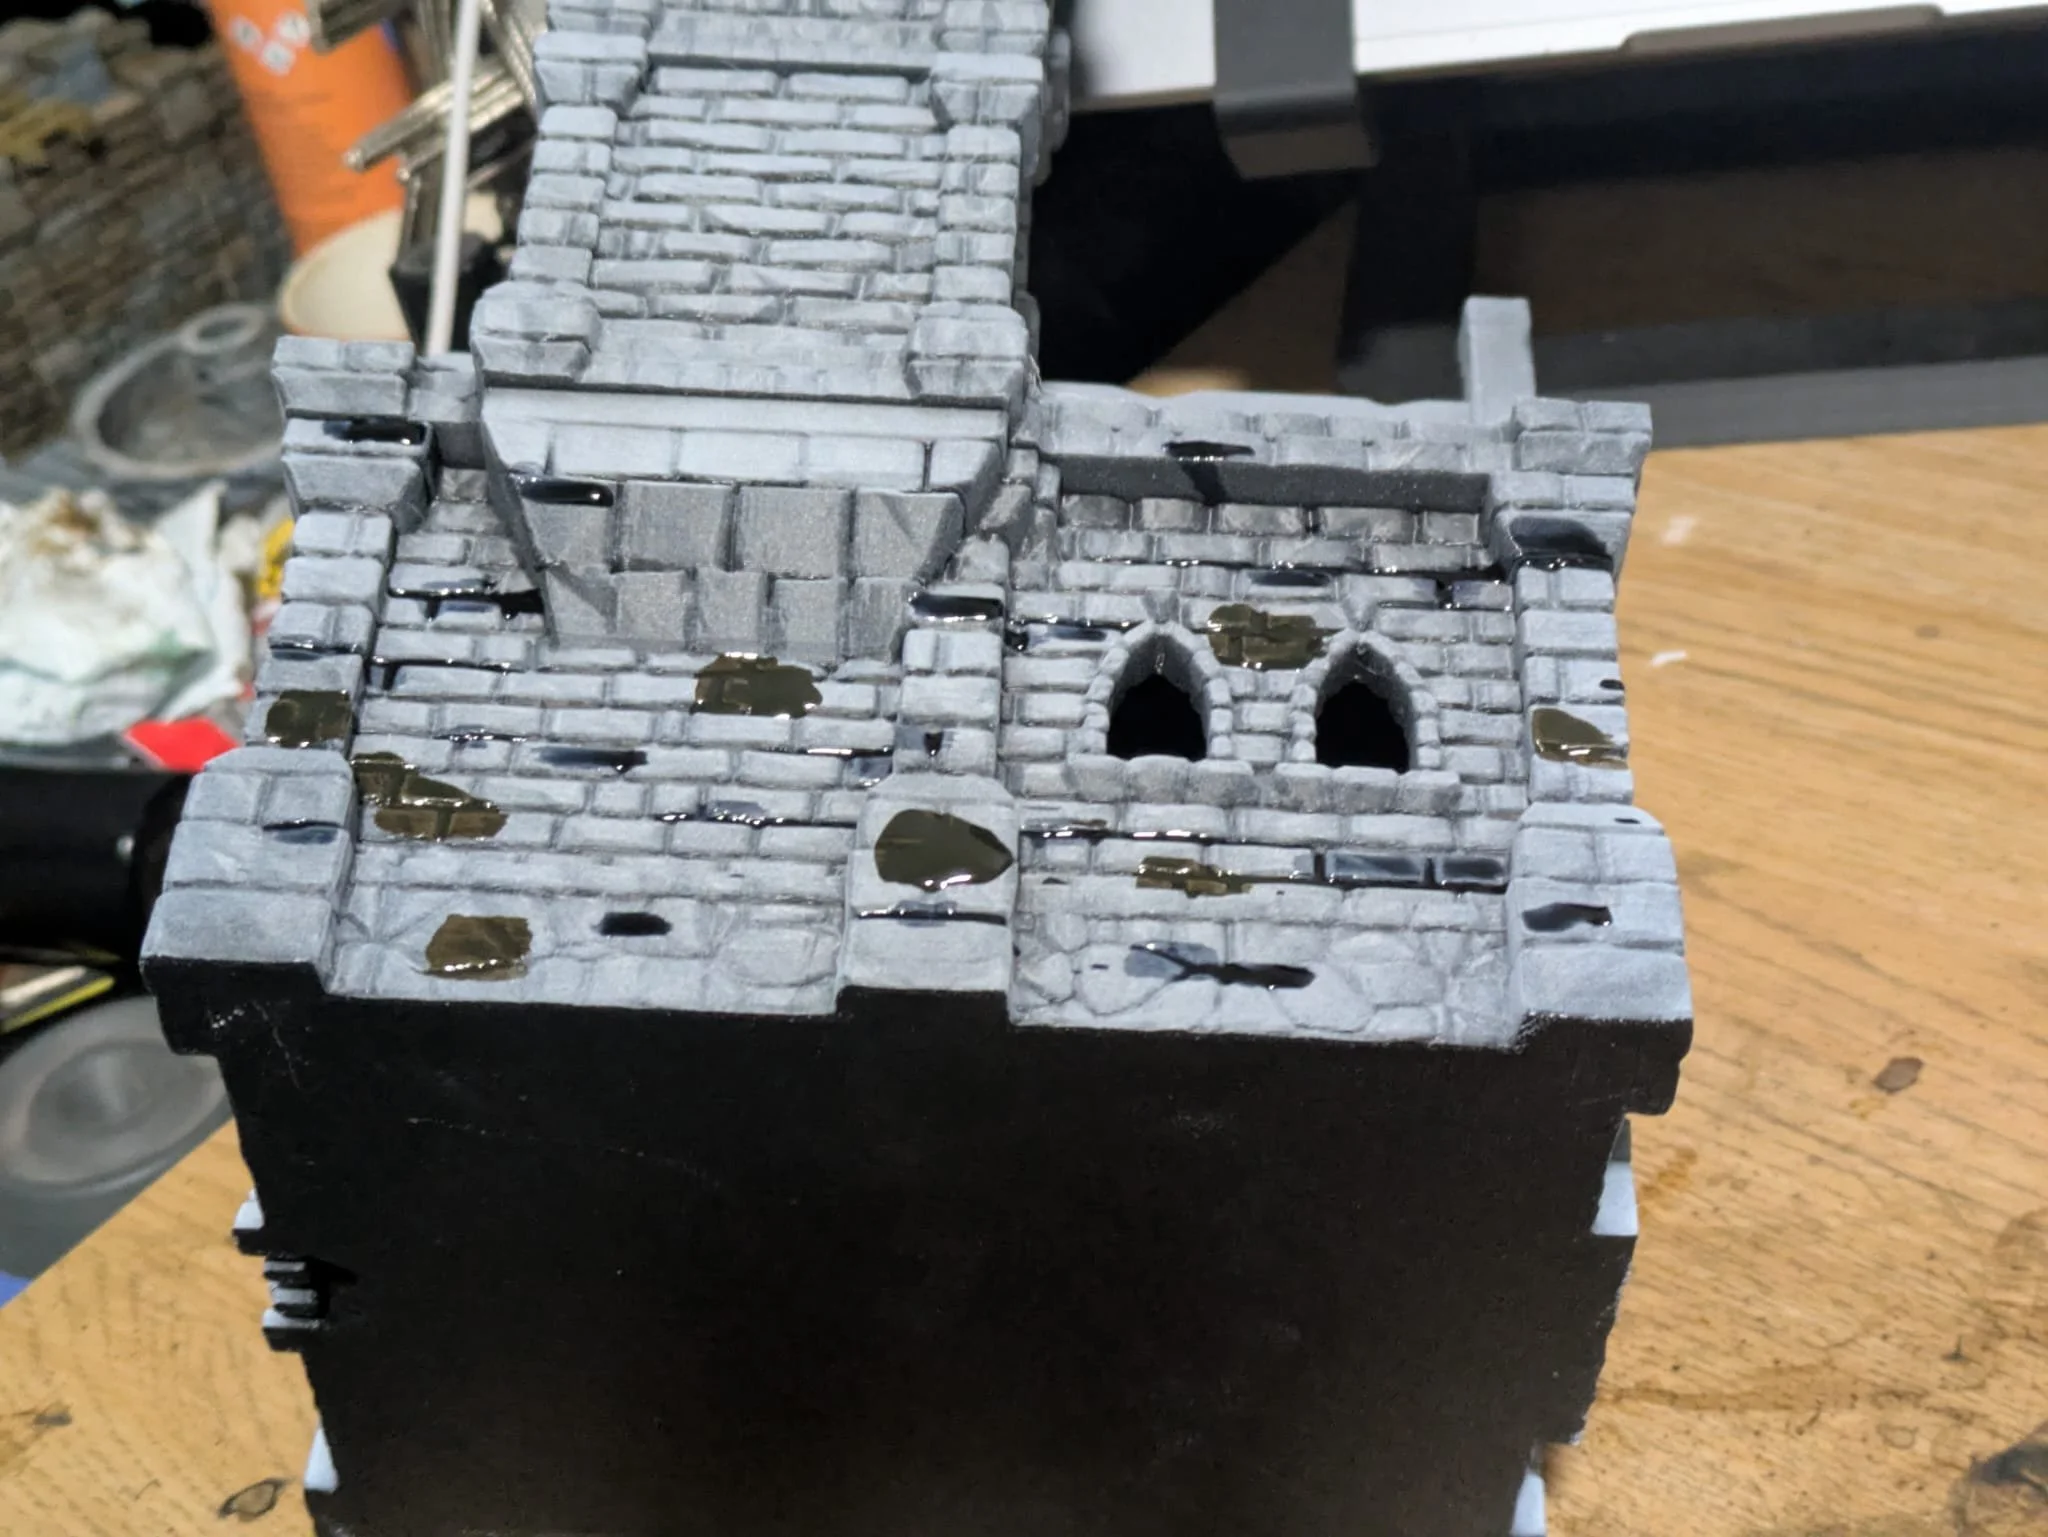
I use the same technique for the roofs, wood, rendering and any other elements, just changing up the paint colours as required. My roofs for example, I use a dark green and a black.
I have found that when doing the beams this way, less watered down is better as the paint has a tendency to soak in and run along the layers via capillary action into the ‘rendering’ areas otherwise. A useful behaviour for blending the walls, and less so for the clean precision of the beams!
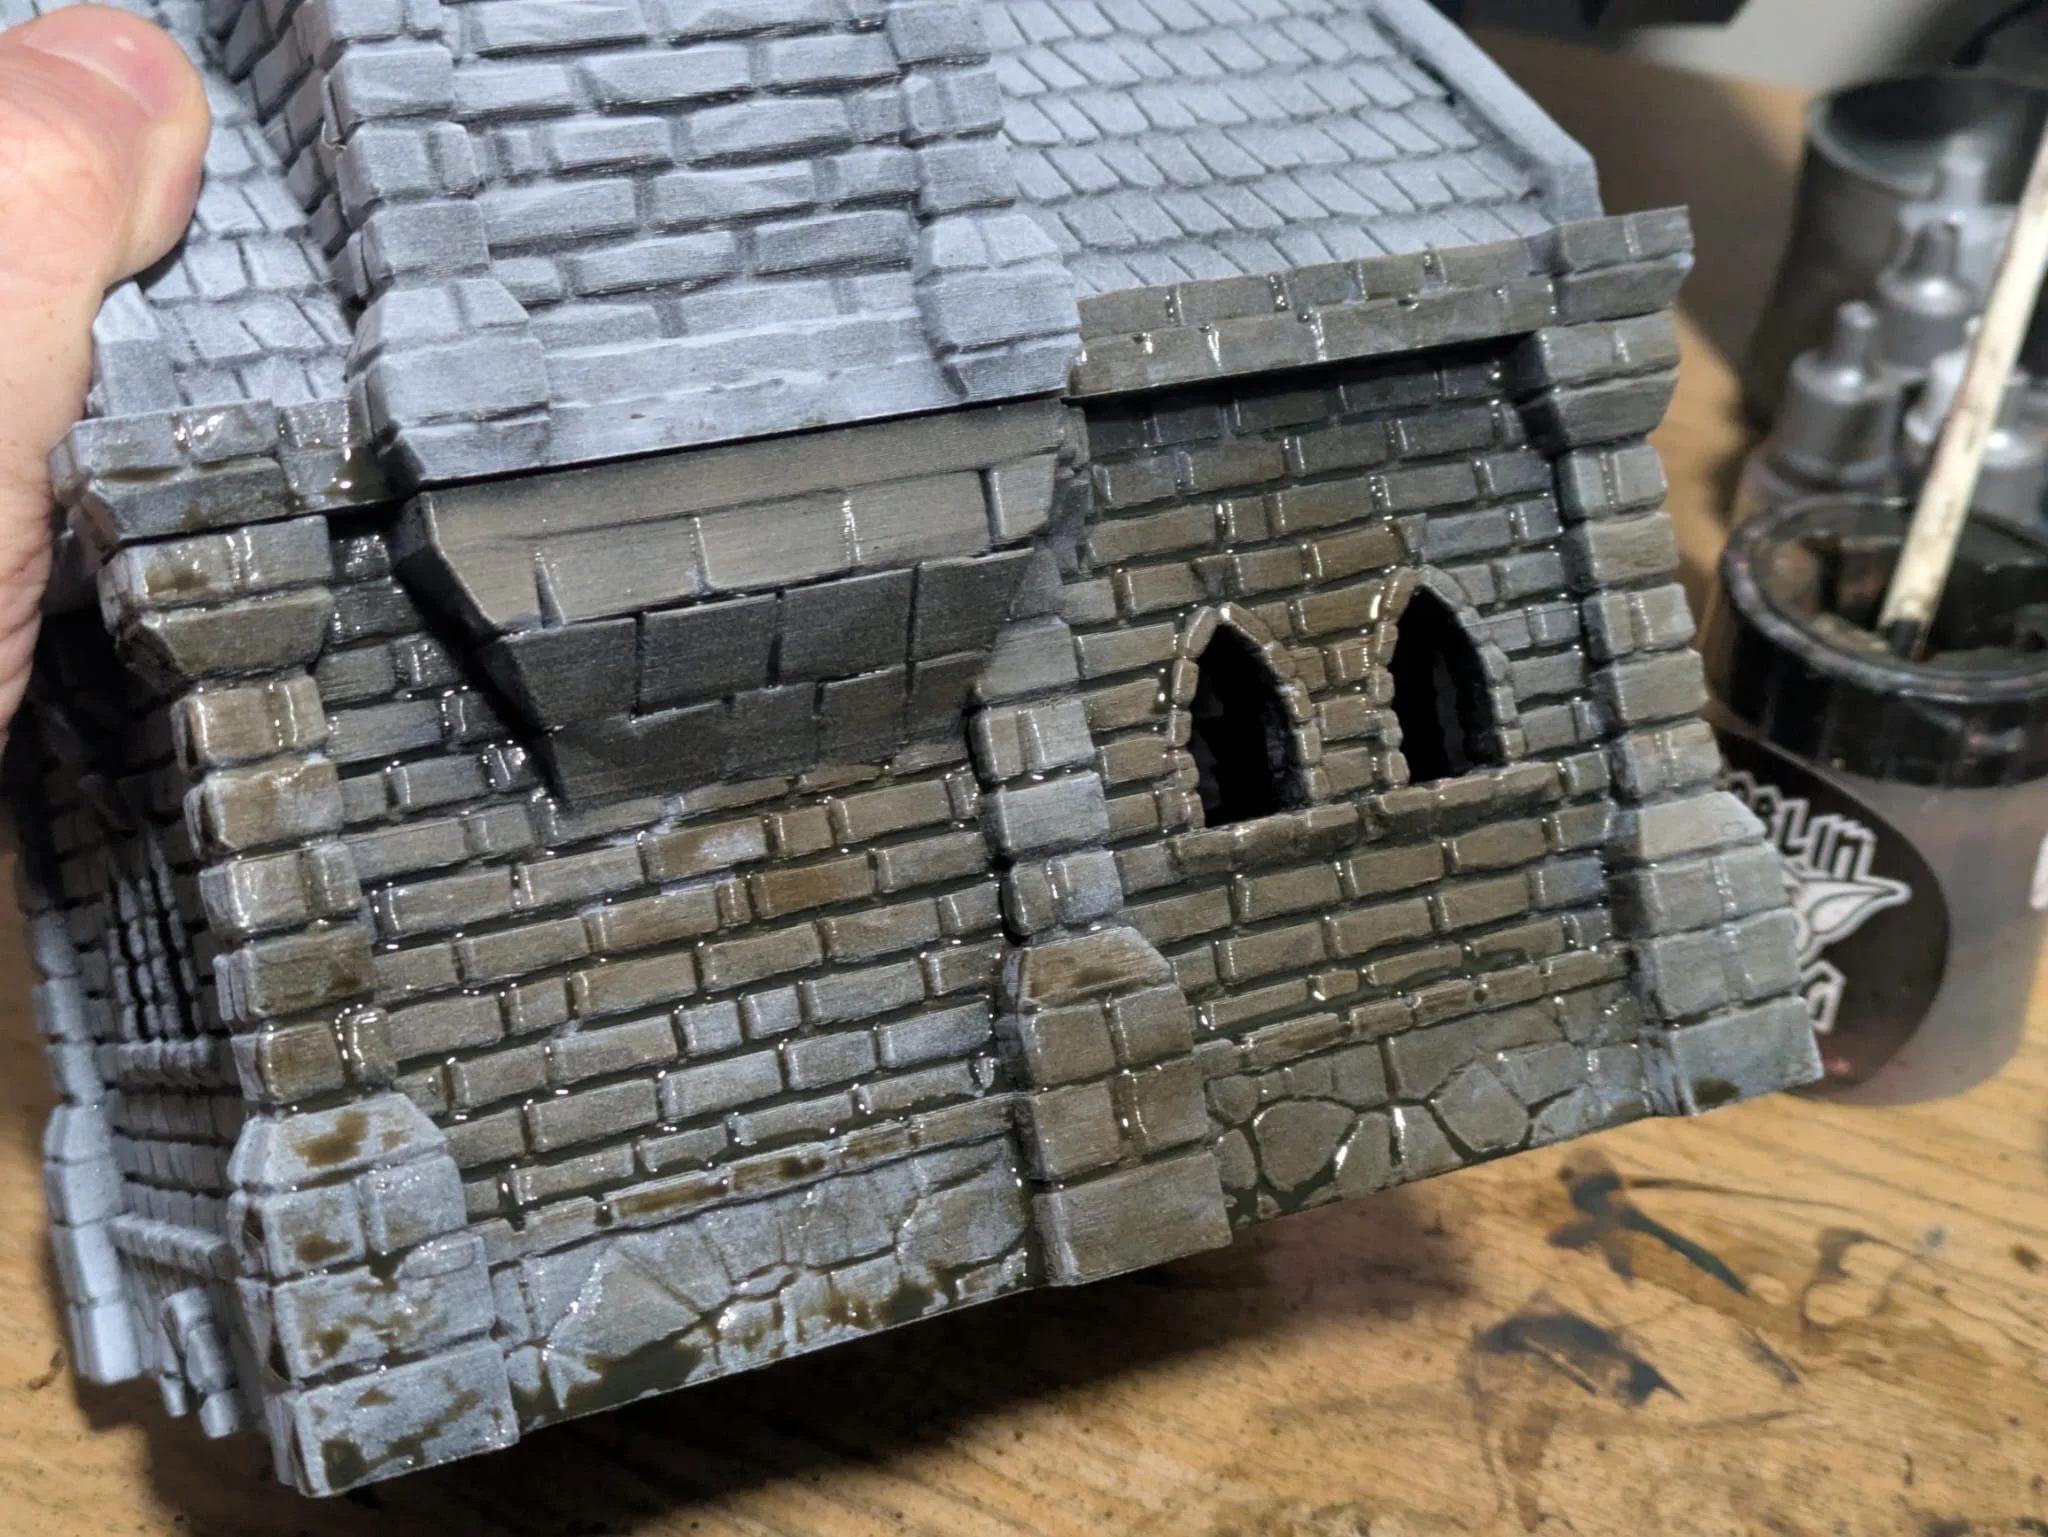
Dry Brushing
Once the building is fully painted this way and completely dry, I then take a normal khaki paint and use it to drybrush the entire piece. This adds subtle edge highlighting and gives the terrain a dirty appearance that I like. As an added bonus, khaki works well as a highlight like this for any colour, but you feel free to use any colour that makes sense to you.
To drybrush effectively, take a brush like this one and dip it into your chosen paint, then wipe most of the paint off it by brushing against (preferably) a texture palette, or at a push, some paper towel until the paint that’s coming off no longer seems wet and streaky. I find it’s good to do a final test against the back of your thumb - it’s easy to tell if the colour is just catching the imperfections of your skin, or drenching you!


Thank You Sinan Atamer
The painting method that I’ve used today came from a video I found by a guy called Sinan Atamer. It’s a pretty basic video, but it’s short and gets to the point quickly. So if you think you’d benefit from watching this painting process rather than reading about it - I got you covered:
Traitor’s Toll So Far
This is my city board so far - it’s not finished yet, but there’s enough for some glamour shots. At some point I might add some sponge work to it to add extra popping highlights, but for now I’m happy with tabletop quality here.

You can see the other scatter terrain items that I’ve done here too, so if you want tips on those, drop me a message in the comments below.
Conclusion
Obviously I’ve framed this entire piece around Guards of Traitor’s Toll, and I hope to make a post about that once I’ve got a few games under my belt, but there’s no reason you can’t use this advice to make sets for other tabletop war games, or even as sets for TTRPGs if you’re a very visual GM. I’d really appreciate it if you could let me know if this has been useful, or if you have any questions in the comments below.
Hey, thanks for reading - you’re good people. If you’ve enjoyed this, it’d be great if you could share it on your socials - it really helps me out and costs you nothing! If you’re super into it and want to make sure you catch more of my content, subscribe to my free monthly Mailer of Many Things newsletter - it really makes a huge difference, and helps me keep this thing running!
Catch you laters, alligators.